Complete Guide to Using Animoto Themes
Animoto was designed to make anyone feel like a pro video maker in minutes, and with themes, you can feel like a seasoned designer too. You can transform any video into a masterpiece using a theme. Let’s dive into how they work.

What are themes?
Themes are sets of colors, fonts, style combos, and filters, curated by our expert video designers. Choosing a theme doesn’t lock you into those design choices–you can still adjust the individual settings however you’d like. Think of themes as your starting point for your video and an intro to all of the design tools available right at your fingertips.
How to use themes
While themes can be used with any template in any aspect ratio, they also make it easy to start from scratch and create a visually stunning video in minutes. This way, you can customize the format of your video while still applying expert design settings in one click. Follow along with these steps to go from start to finish with themes.
1. Select a template or start from scratch
To start as simple as possible, you can select one of our easily-customizable templates, but for this tutorial we’re going to start from scratch.
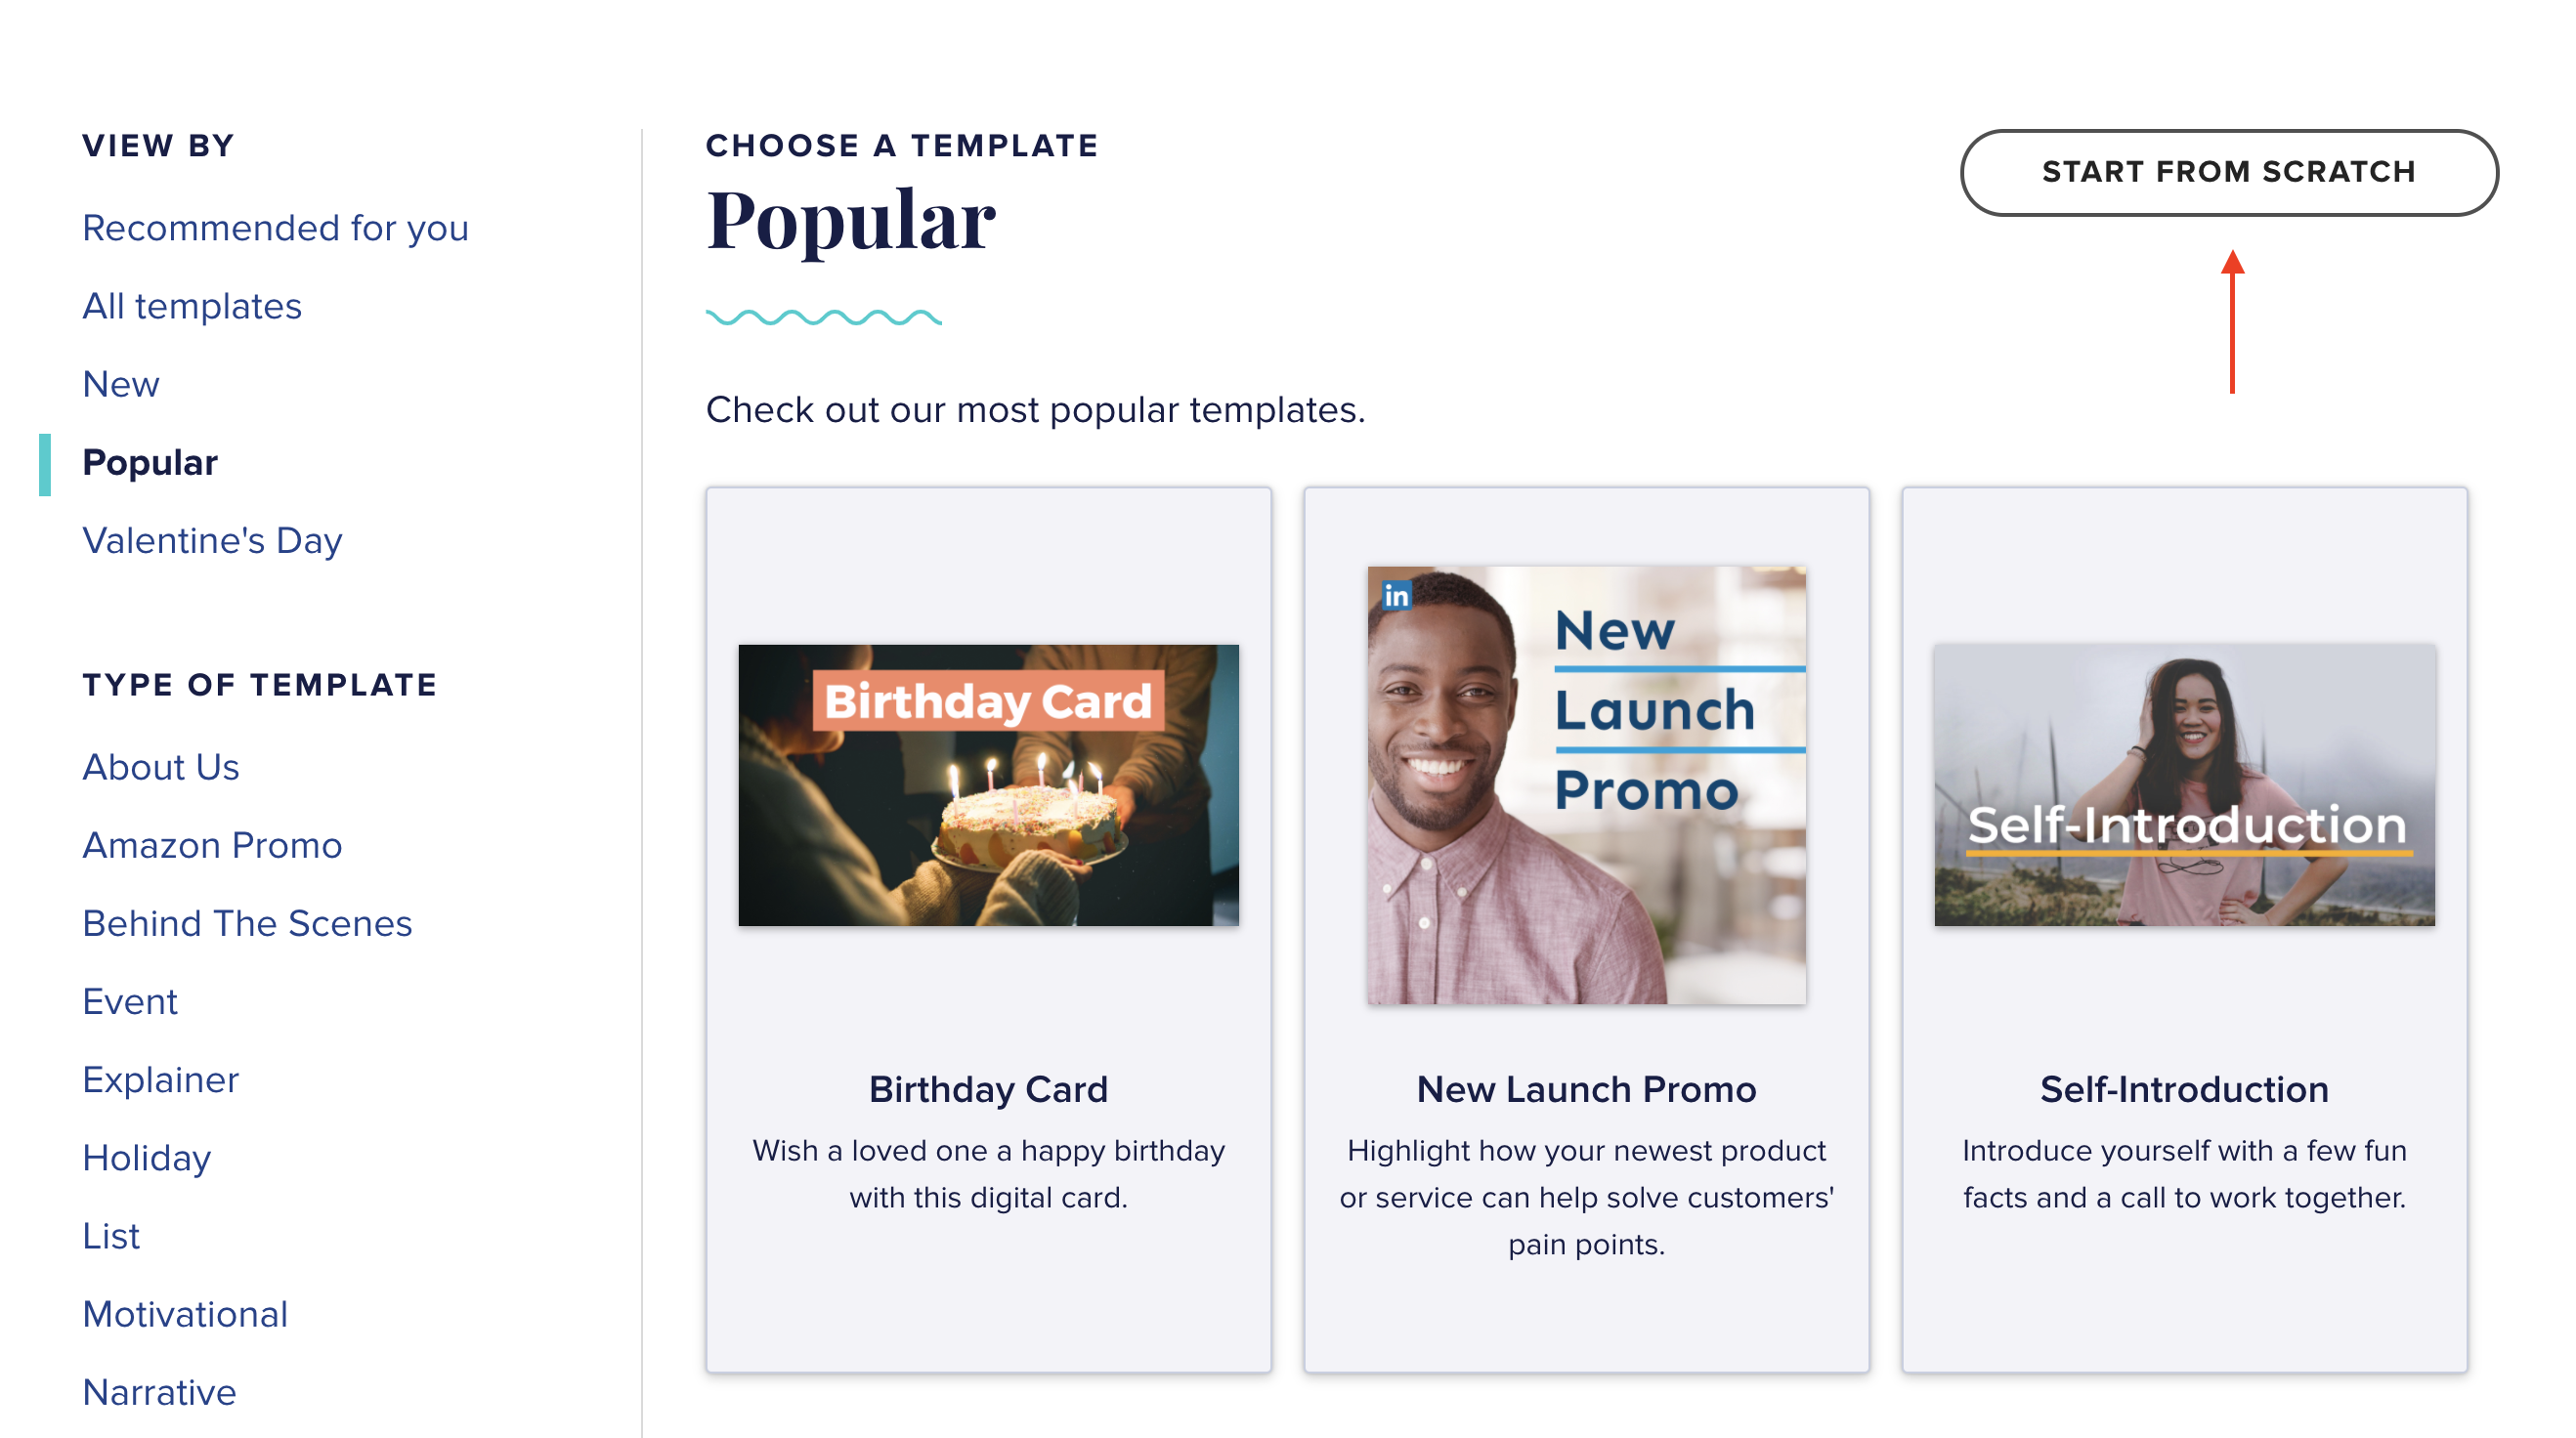
When starting from scratch, the first option you’ll see will be to select a theme. No pressure to make a final decision just yet, you can browse and try them all on your video at any point.
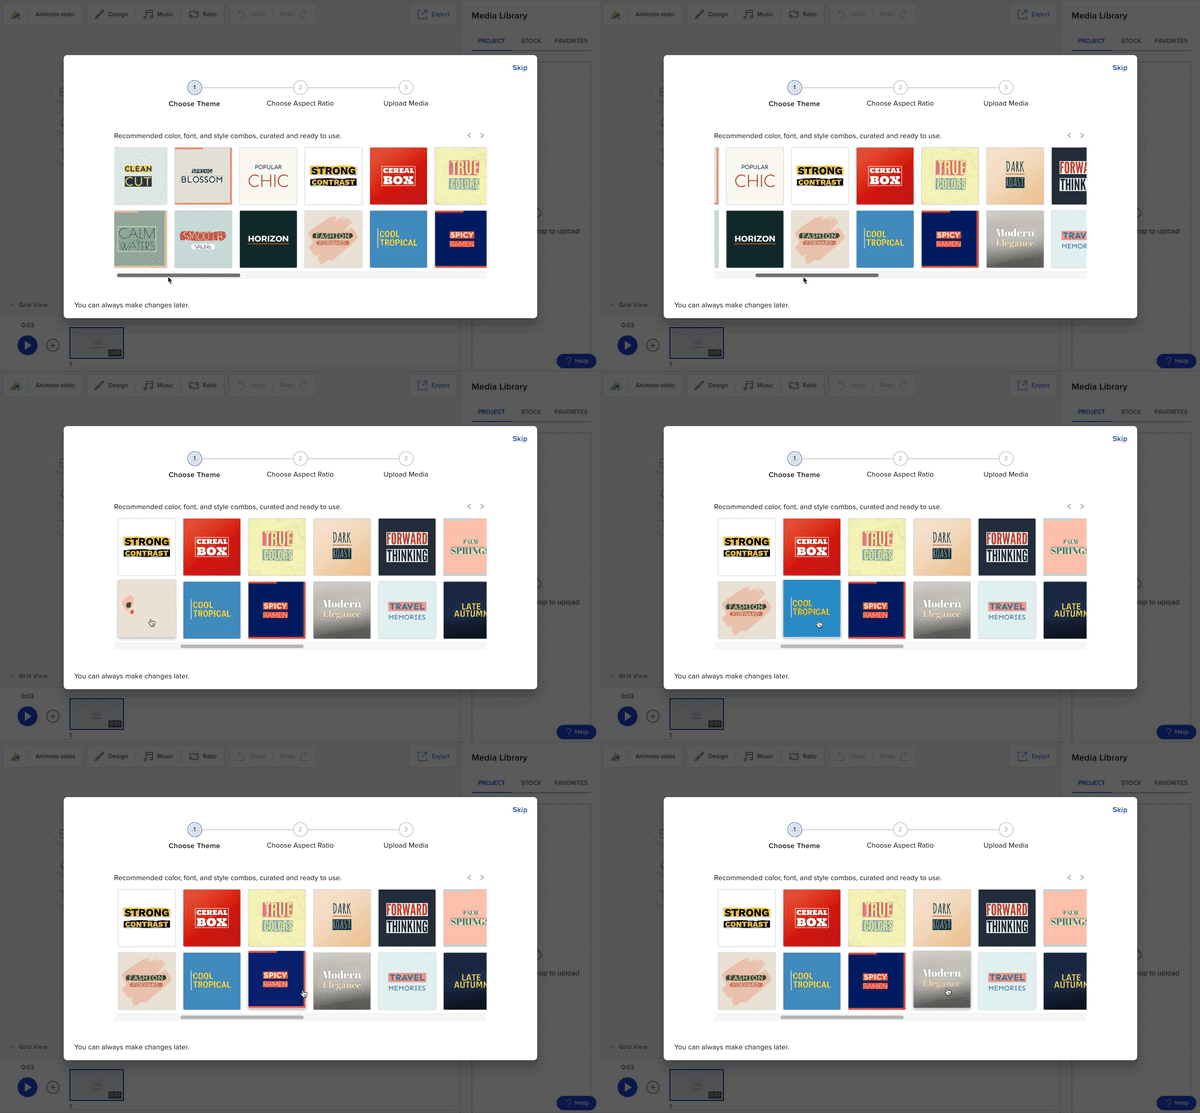
2. Choose your ratio & upload your photos and videos
Whether you start from scratch or choose to use a template, the next step will always be to upload your own photos and videos and select your aspect ratio. Once that’s done, you’ll see a similar workspace to the image below. Be sure to add a few blocks by clicking the + icon on the bottom left. Drag and drop your photos and videos into the open media spaces in each block so you can see your design options in action.
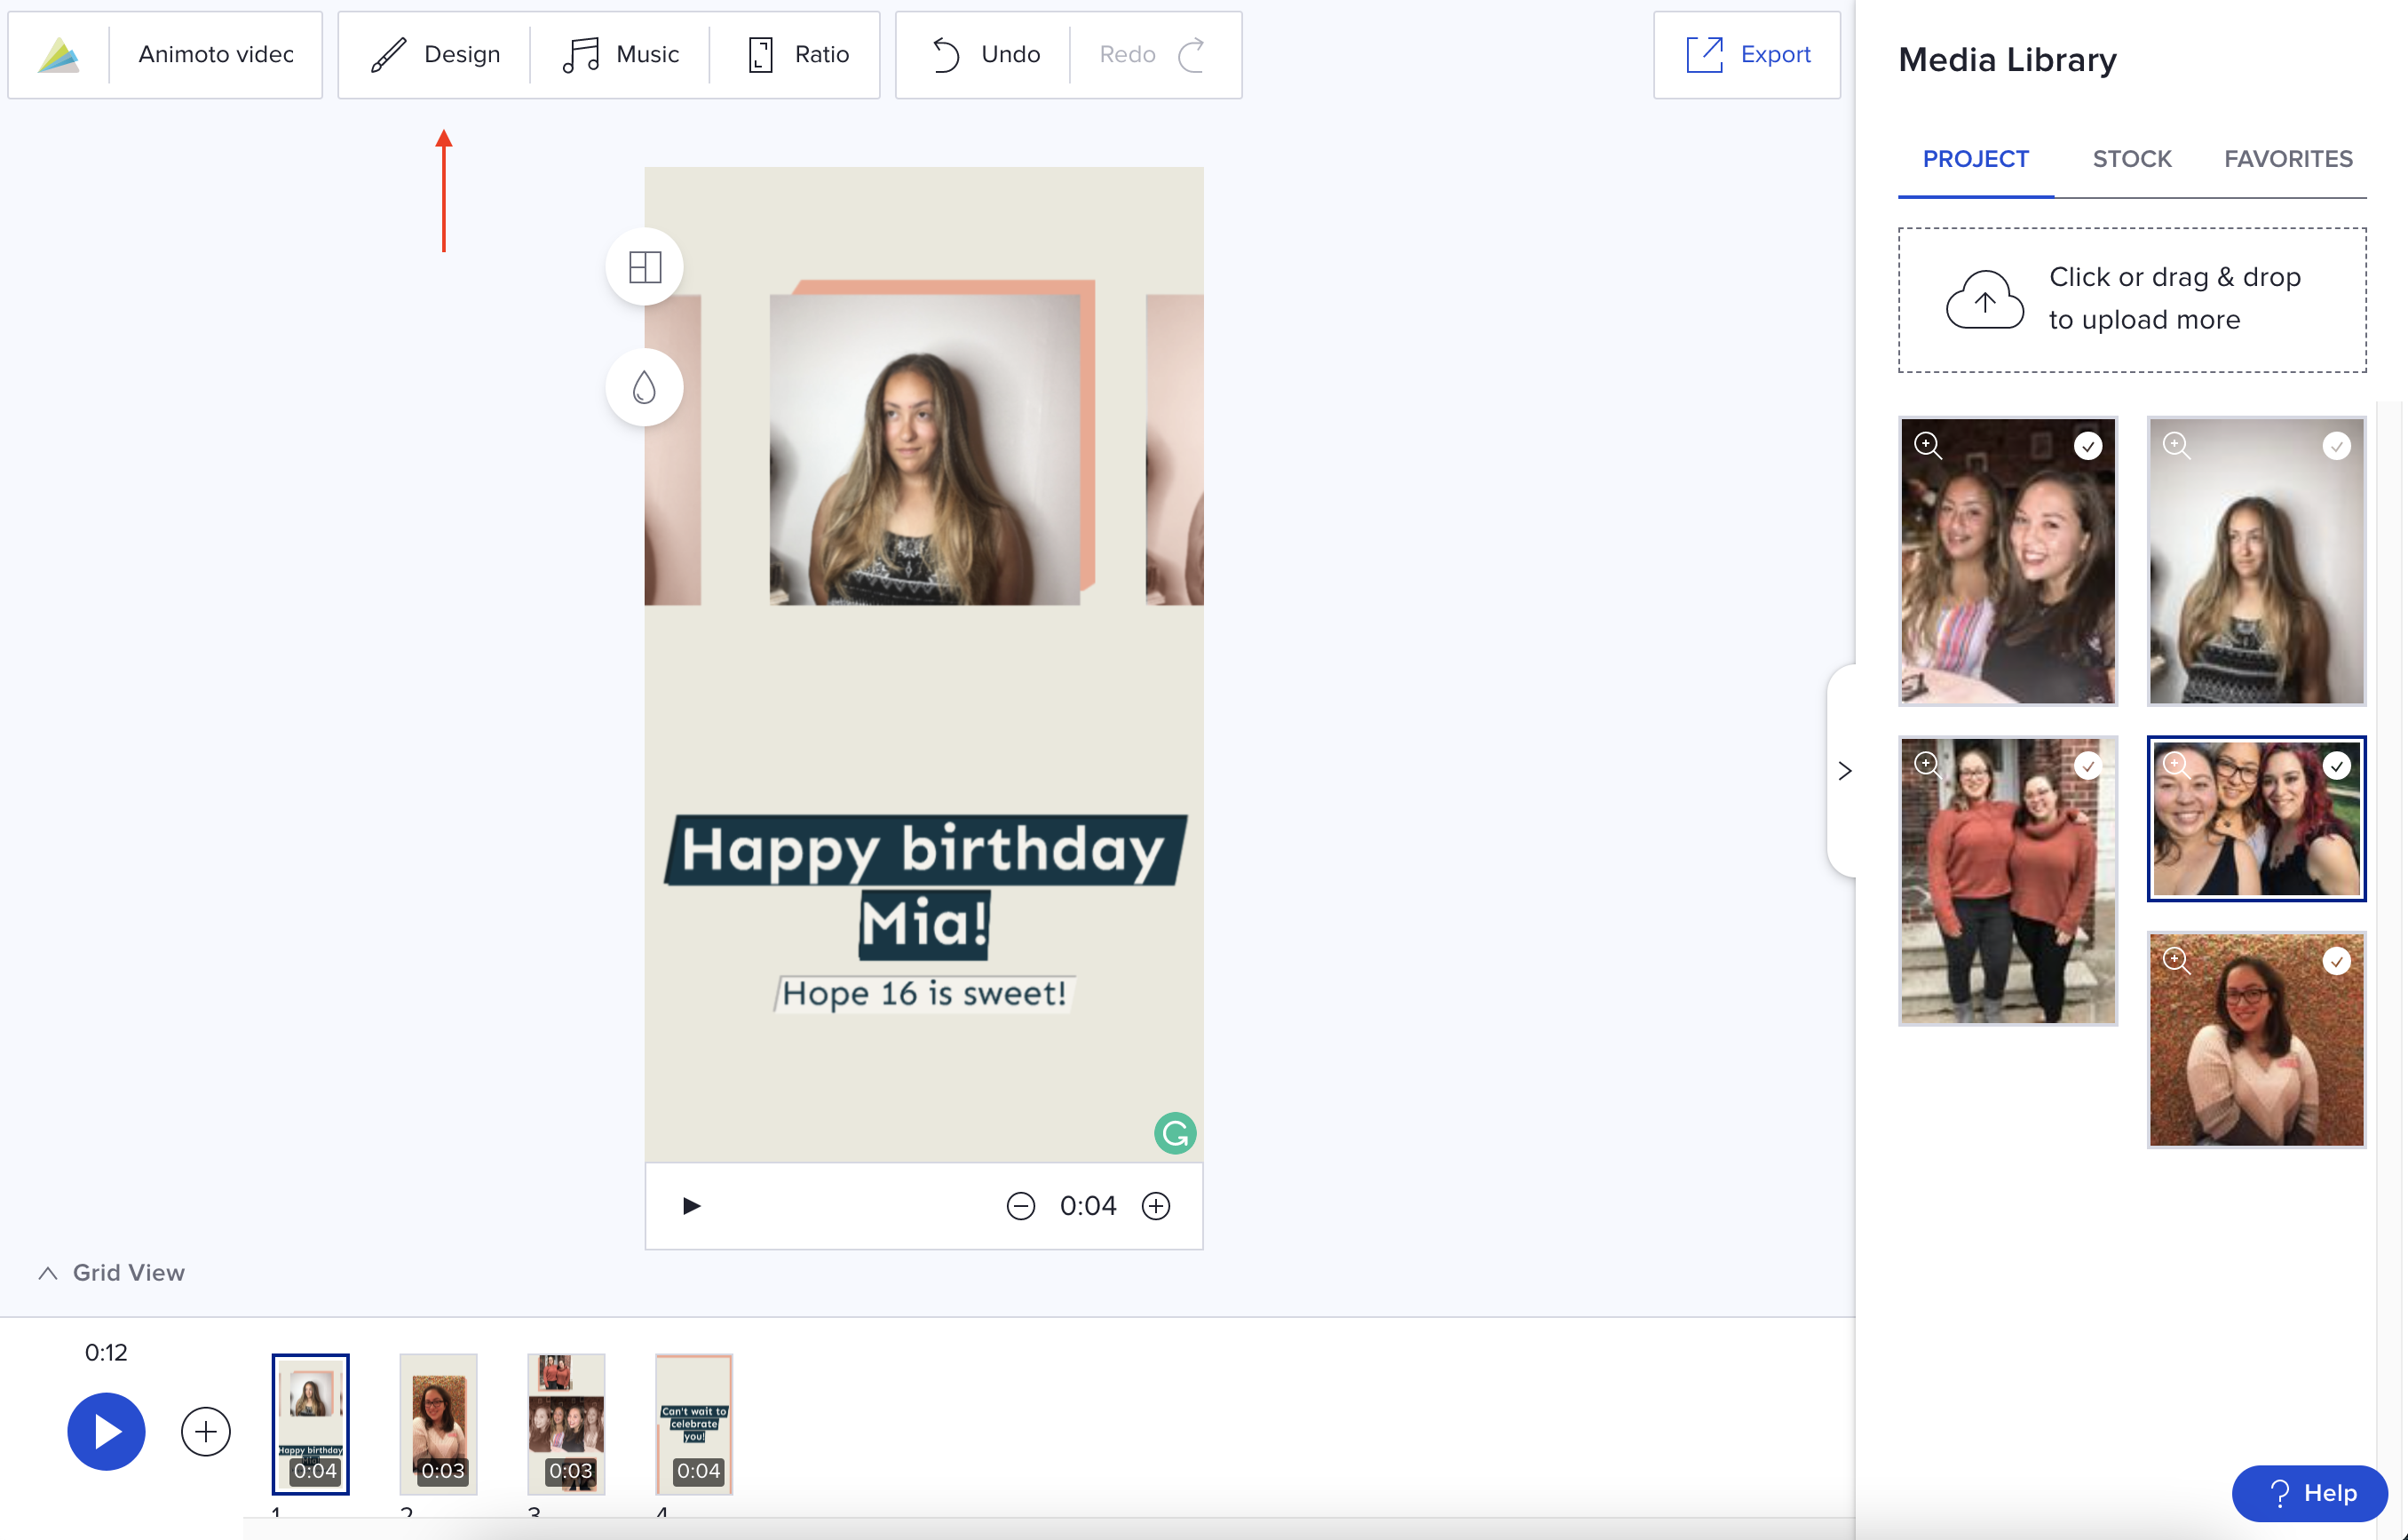
Next, select the Design button on the top left of your screen. This is where you’ll find all of our design tools, starting with themes.
3. Choose your theme
Even if you’ve used them before, we recommend browsing them all–our designers are always adding new themes that you won’t want to miss. Scroll to the right to see every option. You can preview each theme applied to your video in real-time until you find the one that feels best for you.
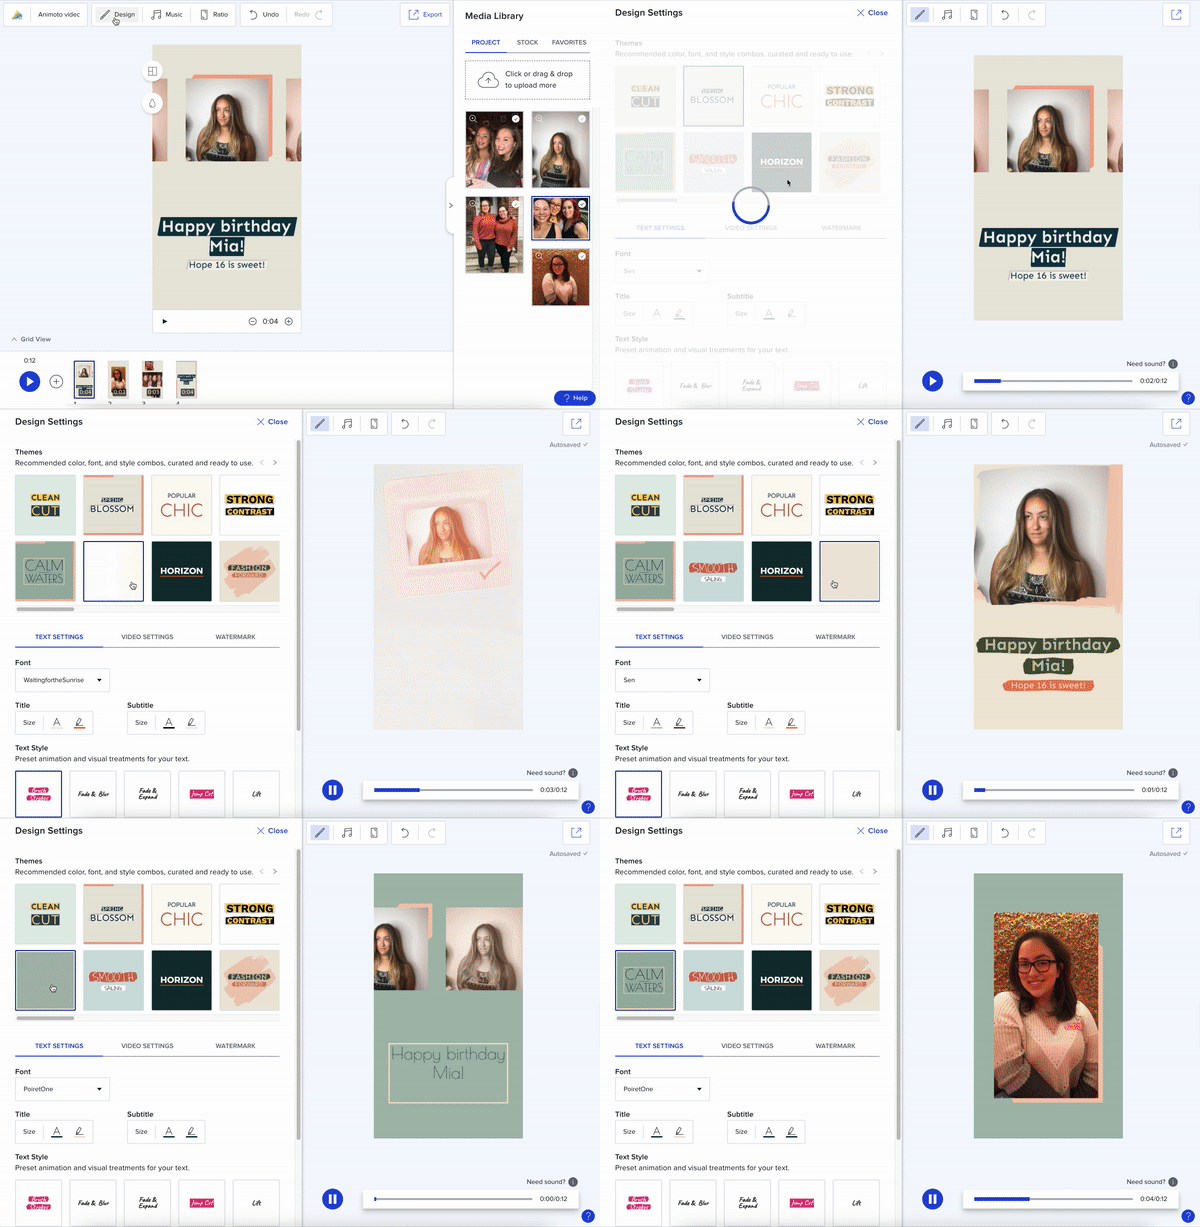
4. Customize your video
With just one click your video can be done, but you can also use themes as a jumping off point. Whether you’re creating video for a brand or to fit your personal aesthetic, you can tweak the design settings in your selected theme to make your video feel just right for you. Simply scroll down to adjust the text settings, including font, text and subtitle colors, and text style. Then click on video settings to edit the video colors, video style, and filters to customize even further.
Want to learn more about our design settings? Click the link below to see the full guide.
5. Browse blocks and layouts
Once you’re happy with the look and feel of your video, feel free to close the design settings. Now, you can explore how all of the available blocks and layouts look in your selected theme. You can also adjust the duration of each block to show off your video a little longer.
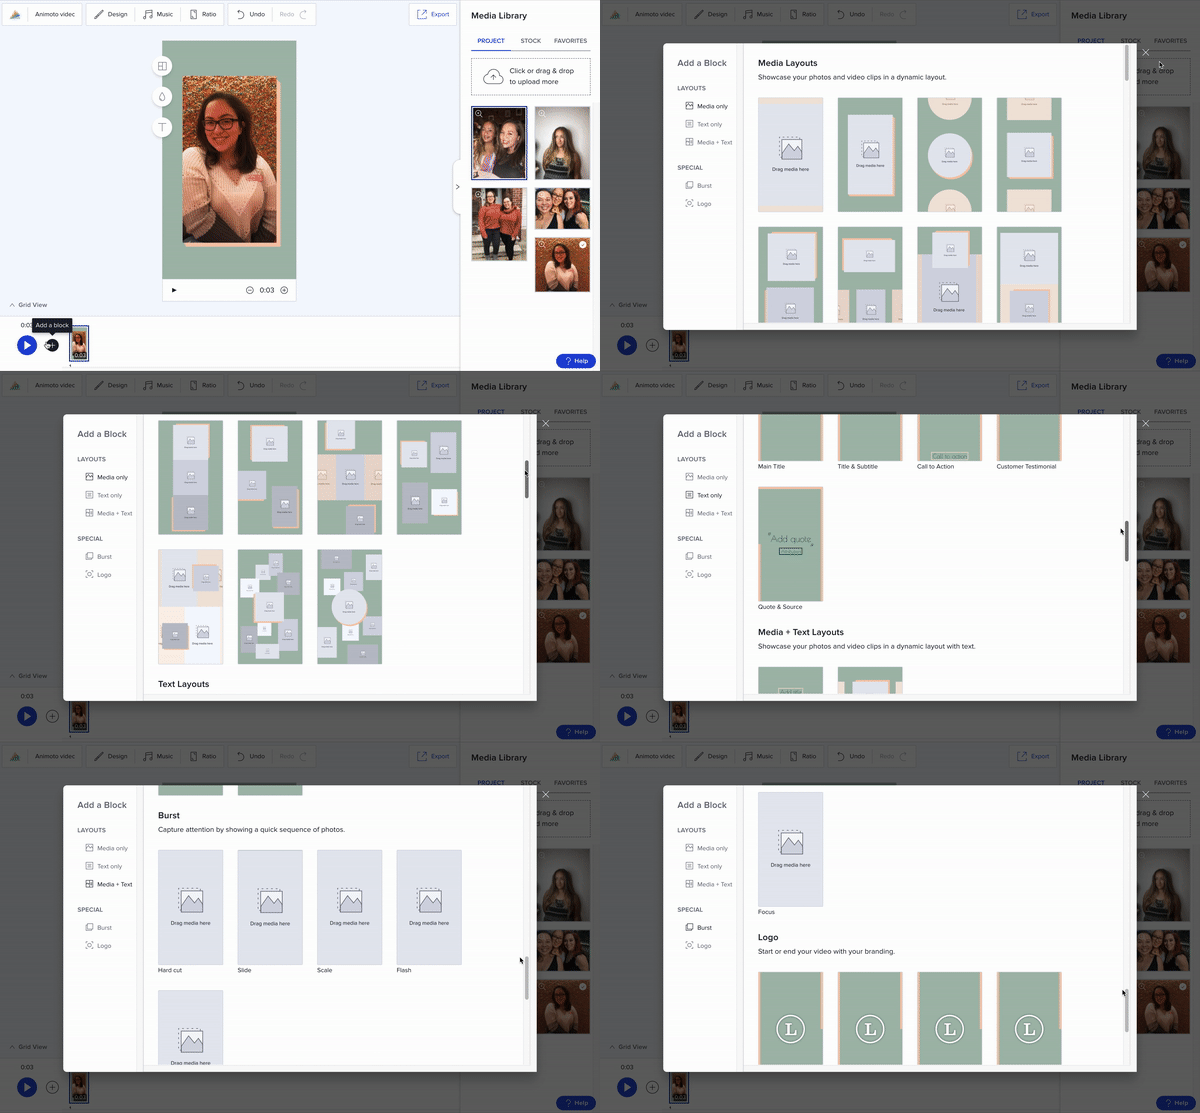
Make any final touches to your video–add music, stock photos and clips, or, if you’re making a video for business, your logo–and click the play button to preview your final results.
6. Export and share
Once you’re happy with the look and feel of your video, feel free to export and share–you can always come back later to make additional edits.
For a full breakdown of your sharing options, including posting your video directly to social media, check out our complete guide below.
When to use themes
There are plenty of ways to make themes work for you, from speeding up the editing process for social videos, to impressing your customers with professional video ads. Here are the top three reasons to use themes in your next video.
To fit your brand
Whether you already have an established brand or you’re just getting started, themes help to establish a consistent look across all of your videos. Keeping a consistent look is essential for brands–both from video to video as well as across all social platforms–because it helps establish recognition and trust with your customers.
Simply select the theme that works best with your offering, customize with your brand colors, and add your logo to create your go-to look that’ll leave your customers thinking you’ve got a degree in design.
To match the mood
Planning your dream vacation? Check out Palm Springs. Ringing in the new year? Golden Luxury might be right for you. Getting ready for the big game? Make it bold with Strong Contrast. No matter the occasion, there’s a theme to match the tone and mood of your video.
To catch eyes on social
With video dominating on social media, you’ll need to take an extra step to stop the scroll and get noticed. Give viewers a reason to like, share, and follow with stunning visuals posts, all at the click of a button. Bonus: with square, landscape, and vertical dimensions, you can size your video just right for every platform.
Get started with themes
Use this tutorial to create your first video masterpiece, and be sure to share your final results in our Social Video Marketing Community group on Facebook. Have any questions about themes? Let us hear ‘em in the comments below, we’re always here to help.
Ready to get started? Sign up for Animoto and make your first video today!
- Marketing video
- Video ad
- How-to video
- Slideshow video
- Social media
- Promo video
- Birthday video
- Intro / Outro videos
- Explainer video
- Email marketing
- Training video
- Internal communications video
- Presentation video
- Business
- Photography
- Real Estate
- Non-profit
- Education
- Ecommerce
- Fitness
- Marketing Agency
- HR / People Ops
- Corporate
© 2025 Animoto Inc. All Rights Reserved.